I once saw an April Fools or some other joke that suggested that some future version of Photoshop could paint your pictures for you using fancy algorithms or whatnot. Well, that day has actually arrived, though it’s a bit more primitive than I’d have liked.
J pointed me to PaintsChainer some weeks ago, and from the moment I saw it I was hooked. PaintsChainer does exactly what I just described: you upload a lineart and it paints it for you. Machine Learning, Whatever, don’t care how. The outputs are quite amazing even if you don’t touch any of its knobs and dials, but they have some flaws and for now I think it’s difficult to correct them.
For painting figures PaintsChainer is pretty good at figuring out where flesh ends and clothing begins, but the colors it chooses for clothing seem to be completely random – though it tends to favor lighter colors. In my opinion this randomness is part of the beauty of a PaintsChainer output, but what if it messed up somewhere (it always messes up somewhere) or I want my painting to be in specific colors?
The creator(s) of PaintsChainer seem to have thought about it at least some, because there is a built-in “hints” tool that lets the user “suggest” what colors to use by marking the input. Unfortunately in my experience the hints are either too aggressive or too passive (filling either a huge swath or nearly nothing with the chosen color), and being more and more explicit with the hints tends to generate more artifacts – on top of any that might already be there.
So as it is, in order to make a reasonable finished product, I feel that I really need to clean up the outputs manually, but this poses its own set of problems, mainly:
- The output from the webapp is too small
- The lineart is integrated into the output
Fixing the small output is impossible with the webapp, but it is possible if you run PaintsChainer locally*. But again this opens up its own can of worms: on my hardware I can only generate outputs about twice as big as those of the webapp (roughly 700 x 500 to 1400 x 1000), and the painting algorithm scales very poorly with output size. Both of these things may be fixable: for the former I think I just need a GPU with more VRAM and for the latter I think I need larger training data, but now it’s going to start costing more money and time than I’d like especially because the second problem still exists.
When I say “clean up the output manually”, I mean paint over the parts that I don’t like in Photoshop on my Cintiq or whatever. Typically when I paint digitally the drawing is on a separate layer from the color, so I can make large adjustments to the painting without affecting the lines – this isn’t possible in a PaintsChainer output which is a simple jpeg. I have tried various things to address this from cutting the lineart out of the output to using the lined output as the color layer, but I haven’t found a satisfactory process yet.
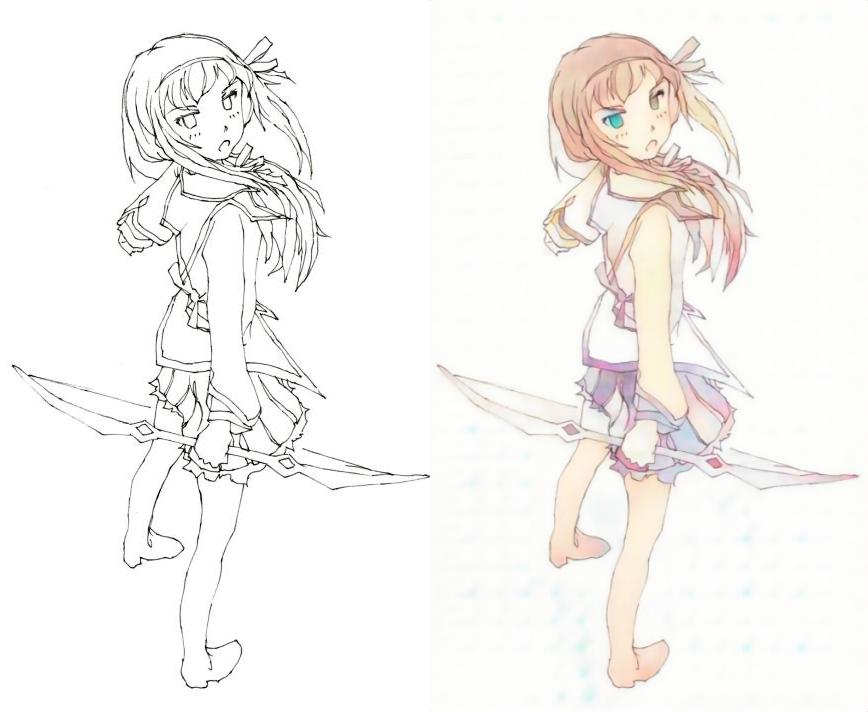
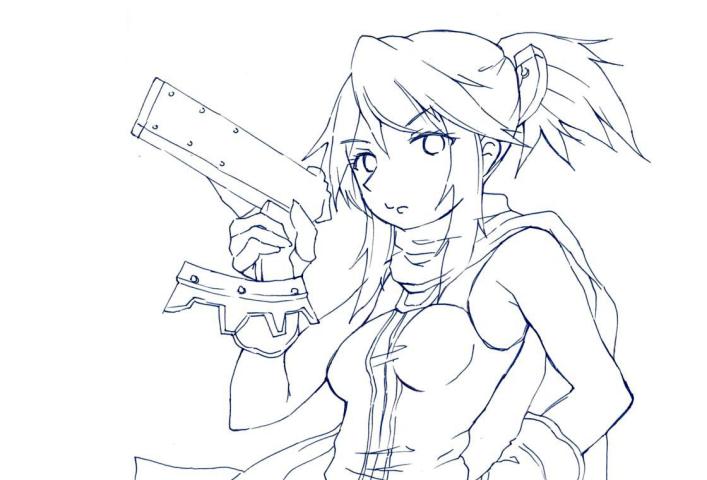
Here is a sample of cleaning up an output, though this process is still crude. The first pic is the base lineart:
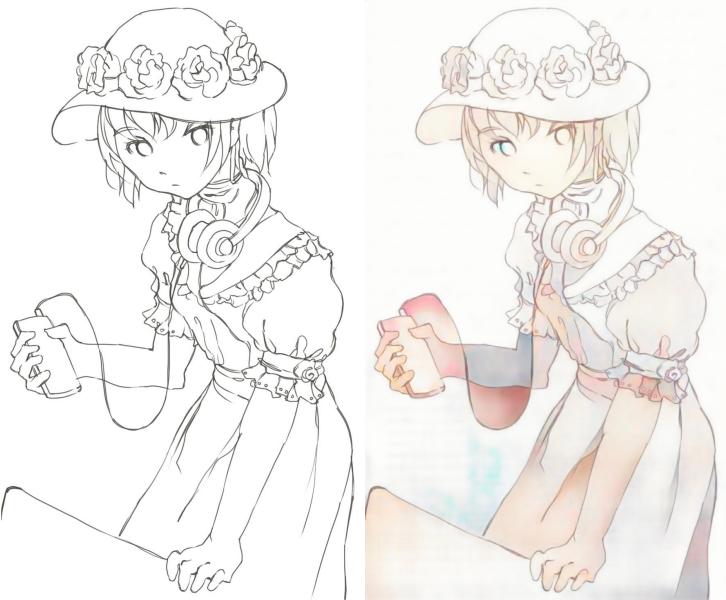
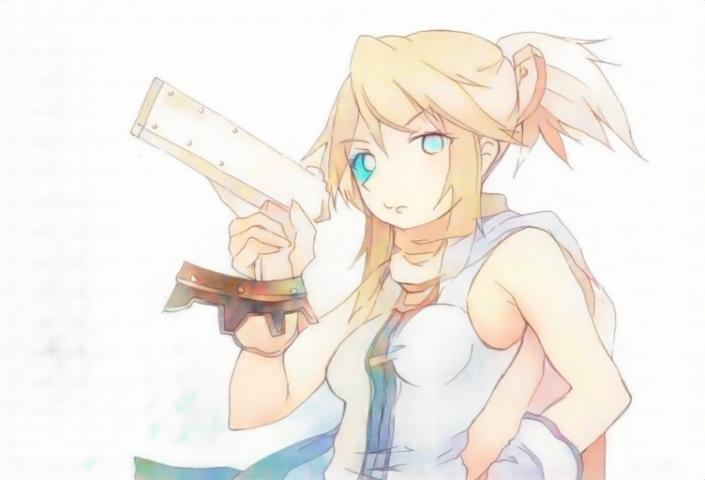
This is the stock output with no adjustments: it’s actually pretty good, but pretty much none of the colors are right:
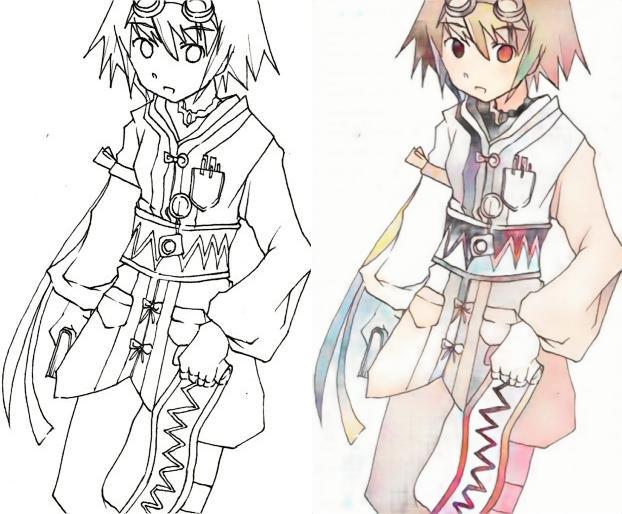
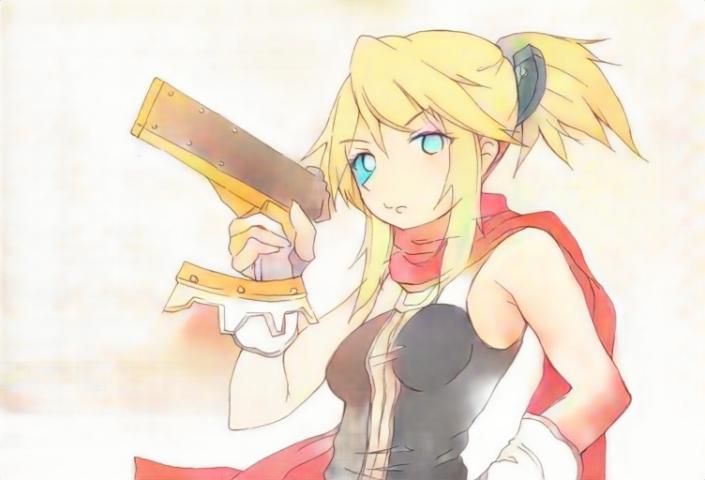
Here is the output after aggressively using the color hints tool – you can see how it’s starting to become messier than stock:
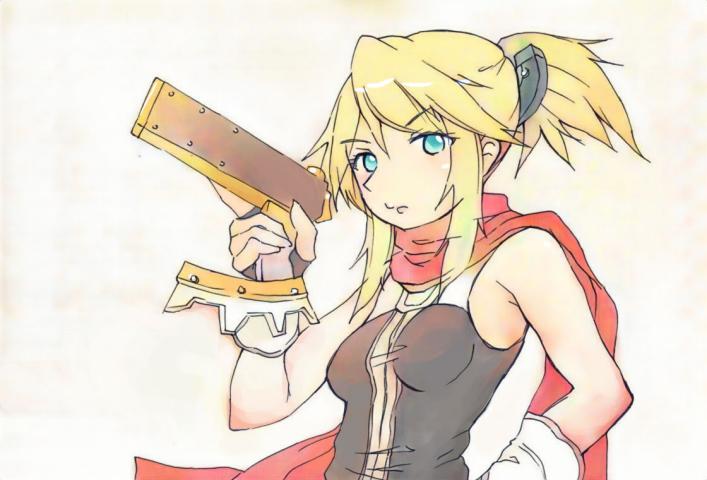
So I have to clean it up and graft the lineart back over it. It “works“, but it’s just not very good because the combined lineart is so heavy:
So I guess we’ll see if anything comes of this. That’s it for now.
Notes on Local Installation:
The creators of PaintsChainer have been generous enough to allow users to download the source code and run the application locally, but the instructions on the site are somewhat vague and full of Engrish, so I am going to document some of the process for myself and for anyone who may be following in these footsteps.
This is for Windows 7 64bit. These are the things you need to install:
- Download the source code and extract it somewhere.
- Visual C++ 2015 Build Tools: I think this is a red herring. I think what you really need is a Windows SDK, which is bundled inside the Build Tools. You have the option of installing the Windows 8.1 SDK or the Windows 10 SDK. I used 10.
- Nvidia CUDA Toolkit: I think you can work around this if you don’t have a CUDA compatible GPU, but I also think it will be super slow**. It’s annoying that you have to sign up to get this. It’s bundled with some stuff, but all you need is CUDA.
- Python: They recommend 3.5. I’m using 3.5.1, and I think it might actually make a difference (as opposed to 3.5.0).
- Numpy, OpenCV, Chainer: These are required Python packages that aren’t necessarily officially supported on 3.5. The PaintsChainer instructions refer to the linked repository of unofficial binaries, and you need to get the ones that correspond to Python 3.5 (the ones that have cp35 in the name). Then you run pip install [name of the package] from the downloaded directory. Do this after installing CUDA.
- Pre-Trained Models: It was unclear to me how to use these. You don’t use these to train the application. You just extract them to cgi-bin/paint_x2_unet/models/ and that’s it.
Then you just run python server.py from the root PaintsChainer directory and it should go. There might be some path things you have to change that I’ve left out, but it should be self evident from any errors that come up. Steps 5 and 6 were the ones that really threw me for a loop.
Notes on Local Performance:
As mentioned in my Pro Kwality Case post, I’m using a GTX 750Ti 2GB. Coloring a 700 x 500 picture takes only a few seconds. 1400 x 1000 is not much slower. I would love to try this out on like a GTX 1050 4GB and see if it’s any faster and/or able to get past 1400 x 1000.